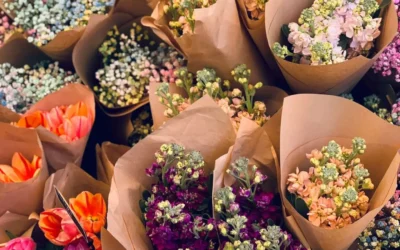
Happy Fall! Fall is my favorite season, and before we hop into winter, I wanted to show you how to make a DIY Flower Crown!
Materials Needed:
· Fresh or dried fall flowers (e.g., chrysanthemums, asters, dahlias, or even leaves!) Go to your local florist to get some gorgeous flowers!
· Floral wire
· Floral tape
· Scissors
· Wire cutters
· A base (you can use a pre-made headband or create your own base with floral wire)
· Optional: embellishments like berries, twigs, or ribbons
Now, let’s get down to business.
Instructions:
1. Prepare Your Flowers:
– If you are using fresh flowers, trim the stems to about 4-6 inches long. For dried flowers, make sure they’re not too brittle!
– Make sure the crown isn’t bulky! Remove any leaves that cause that problem.
2. Create the Base:
– If you’re making your own base, cut a piece of floral wire about 18-24 inches long. Bend it into a circular shape that fits comfortably around your head. Twist the ends together to secure the circle.
– Optionally, wrap the wire with floral tape for a more finished look.
3. Start Adding Flowers:
– This is my favorite part! Begin with your largest flowers. Take one flower and place it against the wire base. Use floral tape to secure your crown.
– For added stability, you can wrap the floral tape around the flower stem and the wire base several times.
4. Layer Your Flowers:
– Continue adding flowers around the crown. Work in a circular pattern. If you’re going for a more natural look, make sure to switch between sizes and types of flowers.
– If you’re using leaves or other decorations, add them between the flowers to fill in gaps and add texture.
5. Secure Everything:
– Use floral tape to reinforce and make sure your crown is securely attached!!
6. Finish the Crown:
– If you’re feeling extra seasonal, you can add a ribbon or twine to the back of the crown for a nice touch. This can also help secure the crown to your head!
7. WEAR YOIR CROWN!:
– You’re done! Your DIY Fall Flower Crown is now ready to wear! Adjust it to fit comfortably, and enjoy your crown. Wear it with pride!
Tips:
– Consider using a mix of colors that reflect the fall season: oranges, yellows, reds, and deep purples.
– If using fresh flowers, try to make the crown on the same day you plan to wear it to keep the flowers looking fresh.
– Experiment with different styles and arrangements until you find what you love!
Thanks for reading! Enjoy your crown. See you next time! Make sure to tag us at @ThatFlowerFeeling to show off your crowns. We can’t wait to see what you create!
Madison Greene
Marketing Coordinator
Flower Enthusiast